The Complete Homeowner's Guide to Cellulose Insulation Removal
Everything that happens between noticing a problem in your attic and having a clean, properly insulated space again — signs, process, safety, cost, and what goes back in.
Why Cellulose Insulation Eventually Has to Come Out
Cellulose insulation is loose-fill material made mostly from recycled, shredded paper, treated with a borate-based compound that does double duty as a fire retardant and a pest deterrent. It's popular for good reason: it's dense enough to resist air movement, it fills irregular attic cavities well, and it delivers solid R-value per inch for the cost. None of that changes the fact that cellulose is an organic, paper-based material sitting in one of the harshest environments in your house — an attic that swings from summer heat to winter cold, absorbs humidity, and is exposed to anything that finds its way in through soffit vents, roof penetrations, or gaps around plumbing stacks.
Over time, that combination of age, moisture cycling, and settling changes what's actually up there. The insulation you had installed 15 or 20 years ago is not the same material today, even if nobody has touched it. This guide walks through how to recognize when cellulose insulation has crossed the line from 'still doing its job' to 'needs to be professionally removed,' what a real removal job involves from start to finish, and what happens after the old material is gone. It's built to tie together everything else on this site — if you want the deep-dive on any single piece, we link out to the dedicated service page for it as we go.
Signs You're Dealing With Ordinary Age and Settling
The most common reason cellulose insulation gets removed has nothing dramatic behind it — it's simply old. Loose-fill cellulose settles and compacts under its own weight over years, and that compaction can reduce the effective loft (and therefore the R-value) of the material by a meaningful margin compared to when it was first installed. A layer that was blown in at a certain depth doesn't stay at that depth forever.
You don't need to climb into the attic to catch most of the warning signs. Thin or patchy coverage visible through an attic hatch, a noticeable draft or dust infiltration into living space below, unexplained allergy or respiratory irritation that improves when you're away from the house, and a slow creep in heating and cooling bills relative to previous years are all consistent with insulation that has settled below where it needs to be. None of these signs alone proves anything — they're reasons to get an inspection, not a DIY diagnosis.
- Visibly thin, patchy, or uneven coverage across the attic floor
- Dust or a fine paper-like debris finding its way into rooms below
- Rising heating or cooling bills without a clear other cause
- Attic insulation older than 20-30 years with no record of a top-up
Signs of Rodent or Biohazard Contamination
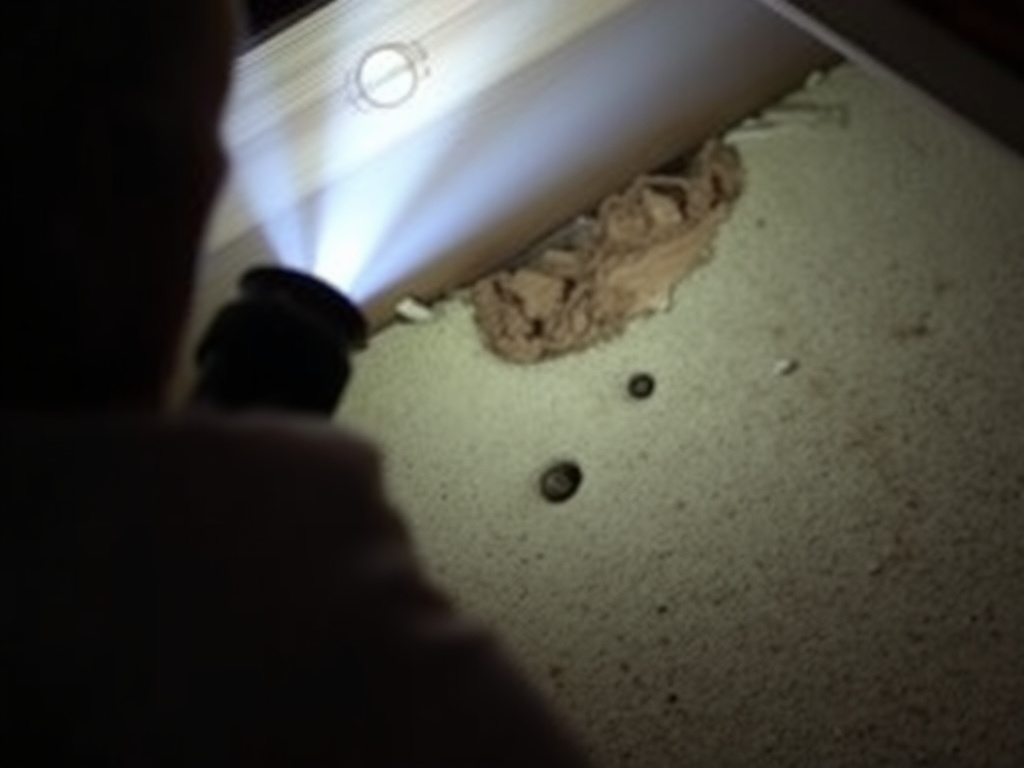
This is a different category of problem entirely, and it changes the whole scope of the job. Mice and rats treat loose-fill cellulose as ideal nesting material — it's soft, it's warm, and it's easy to tunnel through. Signs include visible droppings scattered across the surface or concentrated in trails, dark urine staining, matted-down tunnels running between joists, shredded nesting material balled up in corners, and a sharp ammonia-like odor that gets stronger the longer an infestation has gone on. Scratching or scurrying sounds in the ceiling, especially at night, are often the first thing homeowners notice before they ever look at the insulation itself.
The rule here is simple: look, don't touch. Disturbing droppings or nesting material can aerosolize particles that carry pathogens, and a shop vac or a rake is exactly the wrong tool for the job — it stirs up what should stay contained. Once cellulose insulation has been contaminated by rodent waste, there's no practical way to clean it in place and put it back into service; the fibers hold onto contamination in a way that can't be reversed. That's a full removal, decontaminate, and re-insulate job, not a partial fix. For the full breakdown of what that involves, see our rodent and biohazard-contaminated insulation removal page.
Signs of Mold or Water Damage
Cellulose is paper-based, and paper does not hold up well against sustained moisture. A roof leak, ice-dam backup, condensation from poor attic ventilation, or chronic high humidity can all soak insulation in ways that aren't obvious from the attic hatch — sometimes the visible sign is a musty smell in an upstairs room, a stain on a ceiling below, or discoloration on the underside of the roof decking rather than anything on the insulation itself.
Once cellulose gets and stays wet, it loses most of its insulating value almost immediately, and it becomes a growth medium for mold rather than a barrier against it. 'Let it dry out and see' is not a real strategy here — wet cellulose that dries in place still leaves behind compacted, moldy material with a fraction of its original performance, and mold spores don't go away just because the surface feels dry to the touch. The fix is removal of the affected material paired with identifying where the moisture is coming from. We stay in our lane on that second part — flagging a moisture source for you to address with a roofer or plumber, not performing that repair ourselves. More detail is on our mold and water-damaged insulation removal page.
The Fire-Retardant Age Risk Almost Nobody Explains
This is the single most misunderstood fact about cellulose insulation, and it's the reason we built a dedicated page for it. Cellulose is treated with a borate-based fire retardant at the time it's manufactured, and homeowners generally assume that treatment is permanent — installed once, effective forever. It isn't. Borate compounds leach out of the fibers gradually as the insulation is exposed to repeated moisture cycling and as the material settles and compresses over years, typically becoming meaningfully less effective somewhere in the 15-25+ year range.
The unsettling part is that there's no visual test for this. Degraded, retardant-depleted cellulose looks exactly like cellulose that still has full fire protection — you cannot eyeball it and tell the difference. The signal to pay attention to isn't appearance, it's age and history: insulation older than roughly 20 years, especially in a humid climate or in a home with any history of roof leaks or attic moisture events, is a reasonable candidate for concern. There's also no retrofit product that re-treats old cellulose fire retardant in place — once it's depleted, the only real fix is removing the old material and installing fresh insulation. Full detail is on our fire-retardant degraded insulation removal page.
What a Professional Inspection Actually Checks
Before any removal is quoted, a real inspection covers more ground than a quick look through the attic hatch. It typically includes checking insulation depth and loft across the attic floor (not just near the access point, where coverage often looks better than it is deeper in), a visual sweep for droppings, urine staining, and nesting material, and a check of roof decking and framing for moisture staining, active leaks, or soft/discolored wood that points to a water problem.
It also means assessing the age of the material where that's knowable — sometimes from prior work records, sometimes from visual cues and the age of the house itself — and evaluating physical access: where a vacuum hose can be staged, whether the attic is walkable or requires working from the framing, and how far a truck can park from the access point. All of that determines both the real scope of the job and the honest cost range, which is the whole point of doing the inspection before quoting a number over the phone.
A thorough inspection also checks attic ventilation — soffit and ridge vents that are blocked or undersized contribute directly to the moisture cycling that drives mold growth and fire-retardant leaching, so a contractor worth hiring will flag ventilation problems even though fixing them isn't part of an insulation-removal scope. The goal of the whole inspection is a scope of work you can actually read and understand, not a vague number that gets revised once the crew is already on-site.
The Vacuum-Truck Removal Process, Step by Step
Once a job is scoped, the removal itself is done with an industrial vacuum truck, not a rented shop vac or hand-bagging. The truck stages in the driveway or street, and a large-diameter hose is run from the truck through a window, gable vent, or the attic access point itself, up into the attic. The system runs on negative-pressure extraction — cellulose is pulled directly off the attic floor and through the hose into a sealed containment tank on the truck, rather than being disturbed and left airborne inside the house.
Inside the home, the crew protects flooring and furnishings along the path from the entry point to the attic access, and depending on the scope of the job, sets up containment measures to keep dust from migrating into living space while the attic access point is open. A HEPA-filtered system is what makes this safe for contamination jobs specifically — biohazard material never gets a chance to become airborne dust inside the house, because it's captured at the source and pulled directly into sealed containment.
Timeline varies with square footage and contamination level, but most single-family attics are done in roughly 2-5 hours. A straightforward, uncontaminated attic on the smaller end of that range moves faster; a large attic, one with dense contamination, or one with difficult access (steep roof pitch, minimal clearance, framing that has to be worked around rather than walked on) takes longer. The full walkthrough, including what to expect on job day, is on our vacuum-truck insulation removal process page.
- Site protection: flooring and furnishings covered along the access path
- Truck staging and hose run into the attic access point
- Negative-pressure HEPA extraction into sealed truck-mounted containment
- Ongoing dust control inside the home while the attic is open
- Final walkthrough once the attic floor is clear
Decontamination and Sanitizing After Removal
Pulling the old insulation out is only step one on a rodent or mold job — what's left behind on the framing and decking still needs to be addressed before anything new goes back in. That's a distinct phase with its own tools and its own line item on the invoice, not something bundled in for free by assumption.
In practice, decontamination starts with HEPA vacuuming of the exposed framing and roof decking to pull up loose residue the bulk extraction didn't catch. For rodent jobs, enzymatic cleaners are applied to break down urine odor at the molecular level rather than masking it, since standard cleaning products don't neutralize the compounds that cause the smell. For mold-affected attics, antimicrobial fogging treats surfaces to address spores that have settled onto framing and decking, not just the insulation that already came out. Where entry points are identified during inspection, sealing them is part of preventing the same rodent problem from starting over in freshly re-insulated space. The reason a rodent- or mold-driven job costs more than a routine age-related removal comes down almost entirely to this phase — see our attic decontamination and sanitizing page for the full breakdown.
Where the Removed Insulation Actually Goes
Once cellulose is extracted, it doesn't get bagged and left in the yard for the homeowner to deal with — it's captured directly into the truck's sealed containment tank and transported off-site. What happens after that depends on what was removed. Plain, uncontaminated cellulose that's simply old or settled typically goes through standard disposal channels. Material that came out of a rodent or biohazard job requires bagged, contained handling appropriate to what it's carrying, rather than being mixed in with routine waste.
This is also the answer to a question a lot of homeowners ask before ever calling anyone: no, once contamination is in the picture, this isn't a job you can DIY-and-toss-in-the-curbside-bin. A crew determines the right disposal path for what actually came out of your attic and manages it as part of the job, so it's not a separate hauling problem left on your plate. Full detail is on our insulation disposal page.
What Actually Drives the Cost Up or Down
There's no honest single price for cellulose insulation removal because the job itself isn't a single thing — a few variables move the number more than anything else. Square footage is the baseline: more attic floor area means more material to extract and more time on-site. Contamination type matters just as much: plain old insulation removal is the cheapest scenario, while rodent/biohazard and mold jobs cost more because of the PPE, containment, decontamination labor, and specialized disposal handling described above.
Attic accessibility is the variable homeowners underestimate most. A large, walkable attic with an easy hose run from a driveway-adjacent access point is a faster, cheaper job than a cramped attic reached through a tight scuttle hole, with framing that has to be carefully worked around rather than walked on. Finally, whether re-insulation is bundled into the same visit affects the total — and there's a real efficiency argument for doing it that way rather than leaving the attic exposed and scheduling a second appointment. We don't publish a fabricated price table here, because a real number depends on what our team actually finds during an on-site look, not a generic square-footage formula. Our cellulose insulation removal cost guide walks through every one of these factors in more depth.
- Square footage of the attic
- Contamination type: plain-old vs. rodent/biohazard vs. mold
- Accessibility: attic layout, clearance, and hose-run distance
- Whether re-insulation is bundled into the same visit
Re-Insulation: What Goes Back In
Pulling old insulation out is only half the job — most homeowners want to know what replaces it. The three realistic options are blown cellulose again, blown-in fiberglass, or spray foam, and each one trades off differently on cost, R-value per inch, and resistance to moisture and pests. Blown cellulose is often the most cost-effective choice and remains an eco-friendly option since it's largely recycled material, but it's still an organic, paper-based product with the same long-run considerations discussed throughout this guide. Blown-in fiberglass generally holds up better against moisture and doesn't provide the same food source or nesting comfort for rodents, which matters specifically for a home that just had a contamination problem. Spray foam delivers the highest R-value per inch and the tightest air-sealing of the three, at a higher material and labor cost.
There's a strong practical case for pairing removal with re-insulation in the same visit rather than leaving an attic bare for days or weeks between appointments — an open attic with no insulation is losing conditioned air and is more exposed to dust, pests, and temperature swings in the meantime. For the full side-by-side comparison, including where each option makes the most sense for a home coming out of a rodent, mold, or fire-retardant-age removal, see our re-insulation options page.
Getting Started
If any of the signs above sound familiar — settled or thin coverage, evidence of rodent activity, a history of roof leaks or attic moisture, or insulation that's simply been up there for two decades or more — the next right step is an on-site inspection, not guesswork from the attic hatch. We'll walk the attic, tell you plainly what we find, and put together a scope and quote based on the actual condition of the space rather than a generic estimate.
Every attic is different, and the right combination of removal, decontamination, and re-insulation for your home depends on what's actually up there — not on a generic checklist. That's why every job starts with a real look rather than a phone-quoted number. Whether you're dealing with an obvious rodent problem, a known roof leak, or simply insulation old enough to raise questions, the process described throughout this guide is the same one your home will go through: inspect, remove, decontaminate where needed, dispose of responsibly, and re-insulate with a material that matches your situation.
Call 844-967-5247 or email josh@contractorschoiceagency.com to get a visit scheduled.
Related services
- Cellulose Insulation Removal
- Rodent & Biohazard-Contaminated Insulation Removal
- Mold & Water-Damaged Insulation Removal
- Fire-Retardant Degraded Insulation Removal
- Attic Decontamination & Sanitizing
- Vacuum-Truck Insulation Removal Process
- Insulation Disposal
- Cellulose Insulation Removal Cost Guide
- Re-Insulation Options
Frequently asked questions
Look for thin or patchy coverage, rising energy bills, any sign of rodent activity (droppings, odor, nesting material), a history of roof leaks or attic moisture, or insulation older than roughly 20 years. Any one of these is a reason to schedule an inspection rather than guess — a walkthrough tells you what's actually going on far more reliably than looking through the attic hatch.
Looking is fine; disturbing anything is not. Droppings and nesting material can release airborne particles when they're stirred up, so the safe move is to note what you see, avoid touching or vacuuming it yourself, and schedule a professional assessment. This is exactly the kind of job PPE and contained extraction exist for.
Most single-family attics are done in about 2-5 hours. Smaller, uncontaminated attics with easy access move toward the faster end; larger attics, heavier contamination, or difficult access (steep pitch, tight clearance) push it longer because of the added decontamination steps involved.
It's extracted directly through the hose into sealed containment on the truck and transported off-site — nothing is loose-bagged and left at the house. Plain, uncontaminated cellulose typically goes through standard disposal channels, while material from a rodent or biohazard job is handled with the bagging and containment appropriate to what it's carrying.
It depends on your situation. Blown cellulose again is often the most cost-effective and eco-friendly option; blown-in fiberglass resists moisture and rodent nesting better, which matters after a contamination problem; spray foam delivers the highest R-value per inch and air-sealing at a higher cost. The right call depends on what drove the removal in the first place and your budget.
Ready for a free quote?
Tell us about your attic insulation and we'll build a clear quote for removal, decontamination, and re-insulation.